Pages

Tuesday, November 29, 2011

pumpkins for winter

Have any pumpkins lingering around still? Just today I finally took the orange ones off the front porch (I may do something w/the lg white one) and adorned the tree behind our garbage can with them, lol, they made it bright and pretty back there! : ) Since my kids are little I cant help picking up little pumpkins for them throughout fall. Especially the white and green. They dont go bad for a long time and my conscience doesn't want to toss them but I came up with an idea for turning that bit of autumn into winter.  A Pumpkin Snowman! The little guy came out soooooo cute! and it was a Really fun project!

We went from this:
To this:

I used construction paper, green fleece, buttons, beads, and sticks. For decoration on the hat: feathers, a lg. sequin, and some faux mini holly berries too.  Use what you have, I say! : ) That's what makes it individual, doesnt it?
Other materials used were: hot glue and gun, glue stick, scissors, small branch pruners, compass, and white charcoal pencil.

First, I cut the stems off the pumpkins and found a 'balance' for them, mostly at this point to know which would be the head. Then,  using my compass I determined what the width of hats brim would be.  The circle was drawn on black construction paper and from the same point another smaller circle was drawn inside and then cut out.  I probably would've used a stiff black felt if I had any. 
To get the height of the hat I cut a long rectangle roughly 3.5 times the diameter of the smaller circle to have glueing room for the cylinder.
Here you see the arm branches cut, the fleece cut for a scarf (which is twice the length of the black rectangle), the hat circles, and rectangle measureing 3.5 times the diameter of smaller circle.
The black rectanglehas been folded somewhat accordian style and slits have been cut to the fold on both top and bottom perpendicular to the folds.

 the rectangle has been inserted into the larger circle and the seam glued to be as wide as it needs to be

the tabs have been glued to the underside of the brim
to attach the top part, smaller circle, i used the glue stick on the perimeter of the circle insted of on the tabs to make it easier

then the the details were added : ) honestly before this, i havent used a hot glue gun in probably 6 yrs or more, lol
Next, to make the carrot nose out of construction paper i cut a long right triangle the length of a page. It's height is only about 1.25 inches.
On one side I glue sticked : P
Starting from the wider end and with glue on top rolled the triangle like a making a paper bead but keeping a flat edge
Then came hot glue assembly : ) and snowman was complete ! and ready for his close-up : D


Monday, November 21, 2011

one hot dog : ) or warm anyway

My daughter Katie LOVES dogs : ) unfortunately us having one right now is not a reality. She compromises by taking wonderful care of her 'puppies'. She is a fabulous caretaker of these stuffed animals. This includes washing, dressing, and bandageing their booboos : ) She is a major sweetie and I'm really looking forward to seeing her with her new baby sis in few months!

One night she asked for some clothes for her puppies I had a thought! About a year ago when I sorted through my husbands socks he had a lot of loners : P of which I thought we could use and make some sock puppets one rainy day. We haven't done that yet but I discovered a couple cuts will repurpose a wool sock into a really cute sweater for a little dog, real or play : )


I personally think it's cute enough for a real dog. If I had a little doggie, they'd be sporting one in this colder weather : D
NO SEW! folded to fit and the scrap turns into a mini cute beanie : )  Too Easy!!!!!

Monday, November 14, 2011

falling for toddler art : )

I've decided to start sharing projects I do with my kids with the tag "art by little hands".  I think it is beyond important to Nurture Creativity and do things With our Children.

We did this the other day and had a lot of fun.  Mommy cut out a tree form from a cereal box : ) > glued it to the back of some wrapping paper  > cut some shapes with the cricut > handed the shapes and a bag of dollar store fabric leaves and a glue stick to the three yr old : D  
We had fun sitting on the floor together and Katie was so proud to show it to Daddy : )

Notice how it looks like the bird is carrying off the pear, and the baby squirrel is chasing the mommy up the tree?! These are the sweet things that Just Happen in the hands of a special little person!!! I think it's Special!  it now is hangs on the wall of her bedroom as a work of art : )

I hope you and yours can enjoy this project idea as well! I think the different textures and freedom for creativity can go beyond this and be adapted for different seasons too. : )

Monday, November 7, 2011

wrealthrifty

I couldn't bring myself to spend 20 to 40 dollars, or more, on an autumn wreath so I made this for a little under 6. I love the yellow flowers! and if you can tell from my other blogs I like simplicity! : )
I am a firm believer in the less is more concept often.

Monday, October 31, 2011

pumpkins with my little pumpkin

Another masking tape stencil project with the cricut : P It really takes toddler crafting to the next level! The button pushing is fun of course but she gets to use shapes and colors she wants without any having to make what she does 'look' like what it is supposed to be. Luckily my daughter doesnt have that insecurity because I think everything she does is beautiful, but I have witnessed other kids being unkind because the younger kid does 'scribbles'.... well, my opinion is there are adults who make scribbles and make a mighty fine living for it.  I imagine for many kids and parents die cut shapes do prevent frustrations and inspire. * masking tape cuts really well with depth and speed at 2 : )

Any way we procrastinated decorating pumpkins.... on hallows eve, the night before halloween, we did these : ) I had lots of ideas for pumpkin decorating this year but they just did not happen, oh well (@,@)  
Just making stencils and using black acrylic paint these turned out cute.   To make up for timing I made it halloweenie and autumnal, two birds with one stone you might say (or two squirrels with one bird ) it is a shame I procrastinated because we had a lot of pumpkins to decorate : (


My daughter Katies pumpkin turned out sooooo cute ! and well ! My relation or not, I am genuinely impressed it was done with 3 yr old hands! She's crafty already, lol. My little lady wanted very sweet things on it : )   And here she is trick or treating; she really wanted to be a cow so mommy made her costume. Do you notice the heart on her bottom? lol. There is another on her chest : ) Little man didnt want to wear the costume I made originally (grasshopper) so I made him a cowboy woody vest to match sis, but no pic here, sorry.
HAPPY HALLOWEEN!!!!!!!!!!!!!!!

Sunday, October 2, 2011

warm and cozy : )

A friend of mine is having her first baby, Yay! Got to love babies! and making stuff for them! They didnt find out the gender but she has suspicions it is a boy : P. And from her symptoms, based on my own  experience, I would guess she is having a boy too : ).  Im posting the gift I made for baby here to have a record of the project and to share the method which I personally have never seen made before, so to  me I was being original : D even as basic as it is.

What I did? I made a toddler size blanket and matching crib size (not sufficateable size) pillow with flannel and fleece.  I have never seen nor felt a blanket made out of these together But it is So soft and warm, but lightweight. I need to make one for my little girl (yes, we are havin another girl in January, Yay!).  A really great warmth factor for her November baby. Mommy and Daddy went with a bold green and dark brown in the 'nursery' so those colors were what I went for and I used the most gender neutral print I could find : )

So the process was simple. Cut the fabric,  sew the applique in place, right sides together sew the perimeter with enough left open to turn it out, opening was hand sewed (after pillow was stuffed), then I sewed on the outside (blanket only) two inches from the edge a simple stich border to prevent bunching later.  Lining up the blanket to sew the outside perimeter proved trickier than I anticipated, so beware!
The fleece has it's tendencies to stretch oddly.
And here it is, I love it, and I hope they do too! I know with mine the softer the blanket the cuddlier mommy and baby are!

Saturday, September 24, 2011

simply pretty storage

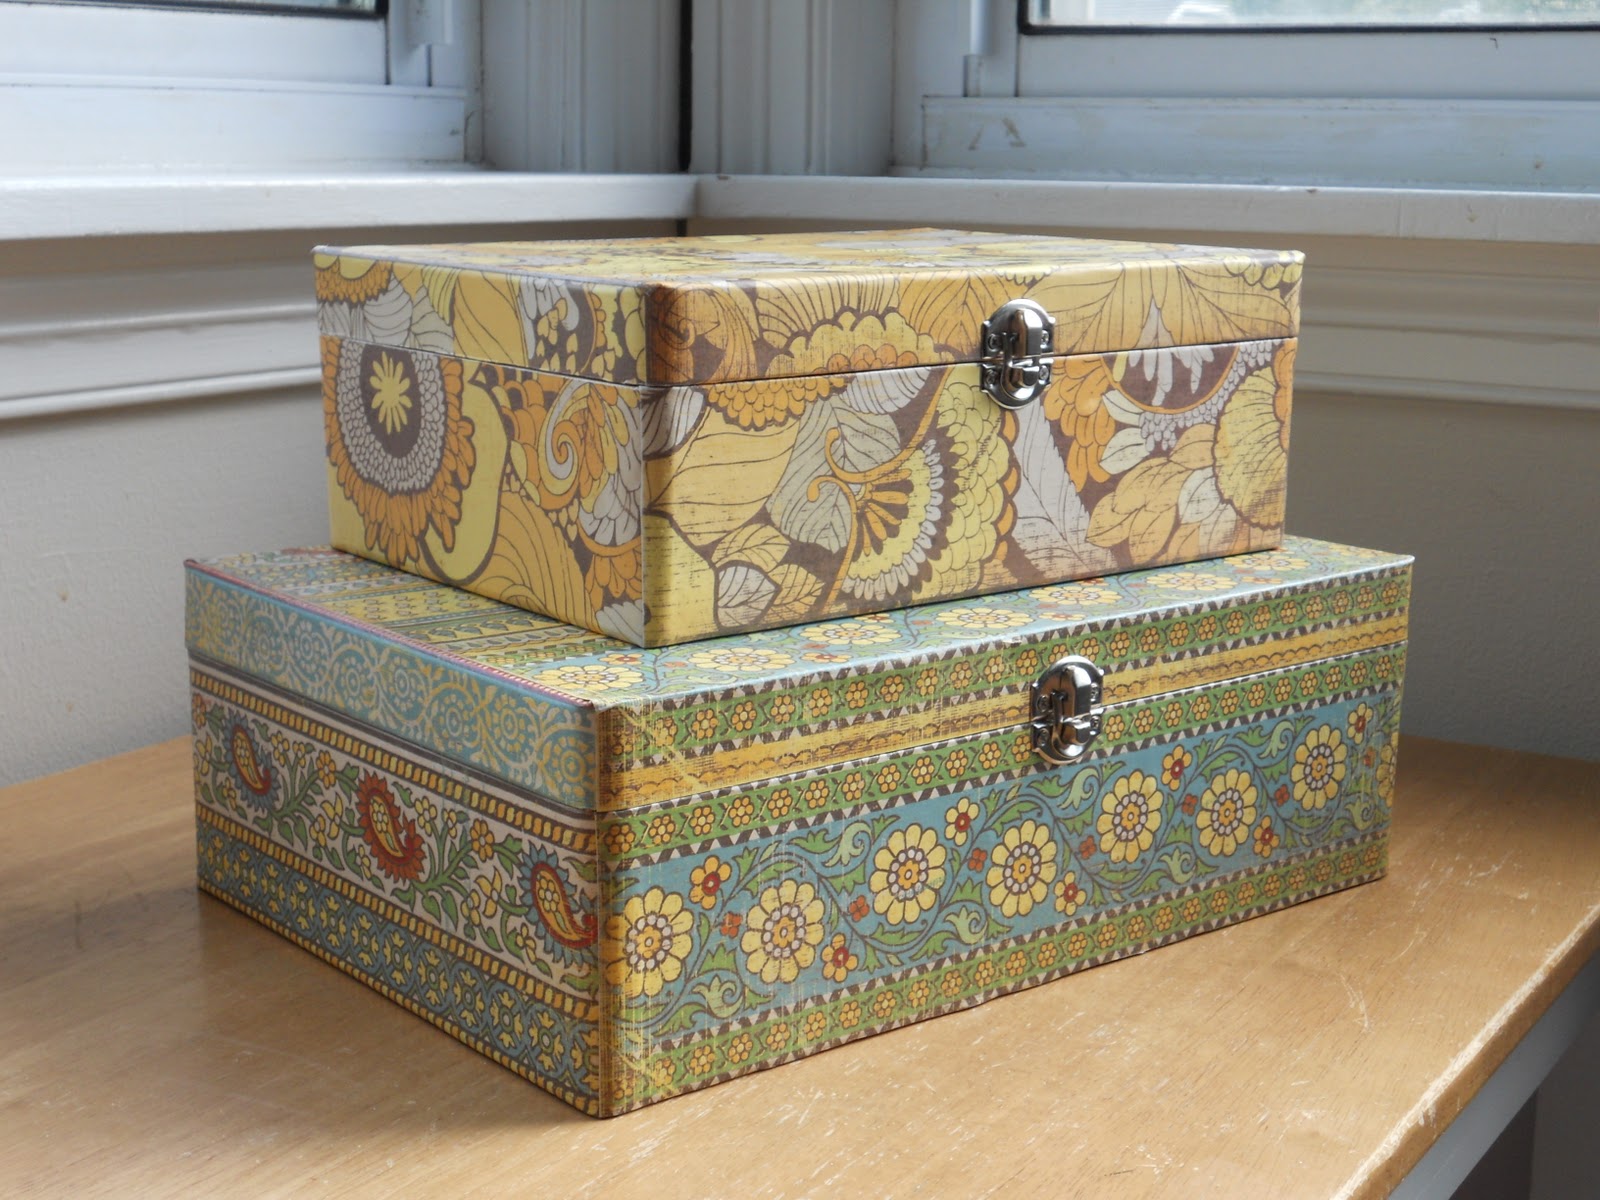
So this little project is just as the title describes. It's simple, but pretty, and useful for storage : ) & effective for coordinating decor : D. 
I had a problem in my bedroom with gaming gear. Imagine that, lol! Ahem, anyway I needed somewhere to keep the extra controllers, cables, adapters, and head sets of the sort.  We certainly are gamer dorks in my household. I thought this up and though it is super basic of an idea I wanted to share it here to show the impact and individual statement you can make in your own space with basically paper (scissors), some modge podge (paint brush), plain wooden boxes from the craft store, and a screw driver to remove and replace hardware.

I found these to be of the best size and sturdiness at my hobby lobby, and although I didnt like the handles I knew the holes of their absence wouldnt show : )


Pretty plain but they aren't actually "pretty". 
I removed the hardware but left the hinges.  That would be up to you whether you would want to or not, I had debated it but decided to leave them in the paper glueing phase. : ) The larger used three 12x12 pages and the smaller used two.  At this point (below) I replaced the hardware over the attached paper to use the same holes and not have to find them blindly.

And here is the finished set : ) Originally I was going to use use a different paper for the smaller one (one that probably matched the paper of the larger better) But I fell in love with it and couldn't help myself from using it.  It reminds me of a vintage 45 case : P ...... the yellows match and they are from the same paper pad, lol. I did coat the boxes in the end with a layer of the modge podge as a varnish of sorts and that itself intensified the colors really nicely and the paper is sealed from damage of normal use : )
Now it's your turn to express yourself. Brighten up a shelf in your home. : ) I know when I was done I wanted to do the same to every wooden box in my house! or at least paint them all bright yellow, lol.  There's a paper out there for everyone!